Below are some photos of how I created the Tricycle:
Handle Bars - I used 0.5mm aluminium tubing and curved the top sections using small tube benders. I then hammered the bottom sections flat to make them wider enabling me to drill a hole through, big enough for the wheel pole to pivot freely. For the inner vertical bars I used 0.5mm with 0.7mm tubing over the top to enable the handle bar section to twist around. To prevent the handle bars from moving up and down this vertical pole I made some fimo washers that fit tightly around the 0.5mm pole holding the 0.7mm tubing in place but still enabling it to twist. The handle grips were also made from fimo enabling me to add detail to make them resemble proper grip-able material.

Back Step - For this I used styrofoam, which I shaped and added ridges. When creating some paint tests the paint I was using didn't look that good on the stryofoam so I decided to do a test of it covered in liquid latex before applying the paint and it worked a lot better so I used this method on the step. To enable the back wheel pivot pole to rotate, I added a 0.5mm aluminium tube to the underside of the step, holding the back wheels pole in place and allowing it to rotate freely. To prevent the step from sliding sideways on this pole I created fimo washers to keep it in place. Finally I cut a small piece of 0.5mm tubing and attached it to the back of the step; for the flag pole to sit in.
Main Beam - I used 0.8mm aluminium rod which I curved by heating up slightly, then cut the edges to the correct angles. Attached to this is the 0.7mm aluminium tubing that slides over a vertical beam in the handle bar section. For the seat support beam I originally wanted to drill a hole right through the beam so the seat height could be altered, however due to the curve of the beam and the angle of which I wanted to drill through the drill bit just kept sliding. Therefore I just glued the seat support beam in place making the seat set to one height. To make it look realistic I added a nut and bolt to the seat support showing how the seat pole is held in place. To give the joins more strength I added Milliput this worked really well so I made it look as if the poles had been welded together as it is on a real tricycle.

The Seat - For this I used fimo as I wanted something lightweight and durable. I then made a small rectangle section that attachs to the underside of the seat for the seat pole to attach to. I also added little pin heads to the four corners to show how that attaches to the underside of the seat.
The Wheels: Tyres -I used fimo to create the wheels as once cooked in the oven for 20 mins it gives a good representation of tyre's. I started by cutting out a circle shape to the correct size and thickness, I then rounded the edges, smoothed then over, added a texture, (I used one of my sculpting tools as the grip section on this tool has a nice texture to it, perfect size for on this tyre) I added little diagonal lines going around the tyre for its tread and finally cut out the inner section. I repeated this method for all the tyre's.

The Wheels: Inner Section -I also used fimo to create these as this material is slightly flexible once cooked therefore enabling me to tightly fit them within the tyre. For the front wheel I decided to cut out sections to make it a more prominent feature compared to the back wheels which I left solid. To hide some messy sections and referring to what an actual tricycle wheel looks like I added rims just to finish them off.
Pedal Bar - For this I used a piece of 0.3mm aluminium rod which is easier to create a nice bend compared to the tubes which tend to get kinks where bending. For the pedals I used fimo and added a grip texture to the top and bottom surface to make them look as if they can achieve what they do on a real tricycle, which is enable the users foot to grip upon the pedal surface. At the ends of these I added a small pin head to show how it is connected and enable it to twist around upon the bar.
The Flag - For this I used a piece of 0.3mm aluminium tubing to make it lightweight compared to the solid tubes. I then cut out a net of the flag, placed it over the pole and sowed around the flag and down next to the pole. After completing some tests with the iron on transfer kit I decided to iron on a white skull design, however when placing it with the completed bike I decided that a red skull would look a lot better. I finally created a fimo washer and glued this to the flag support pole to help make the flag pole sturdier.

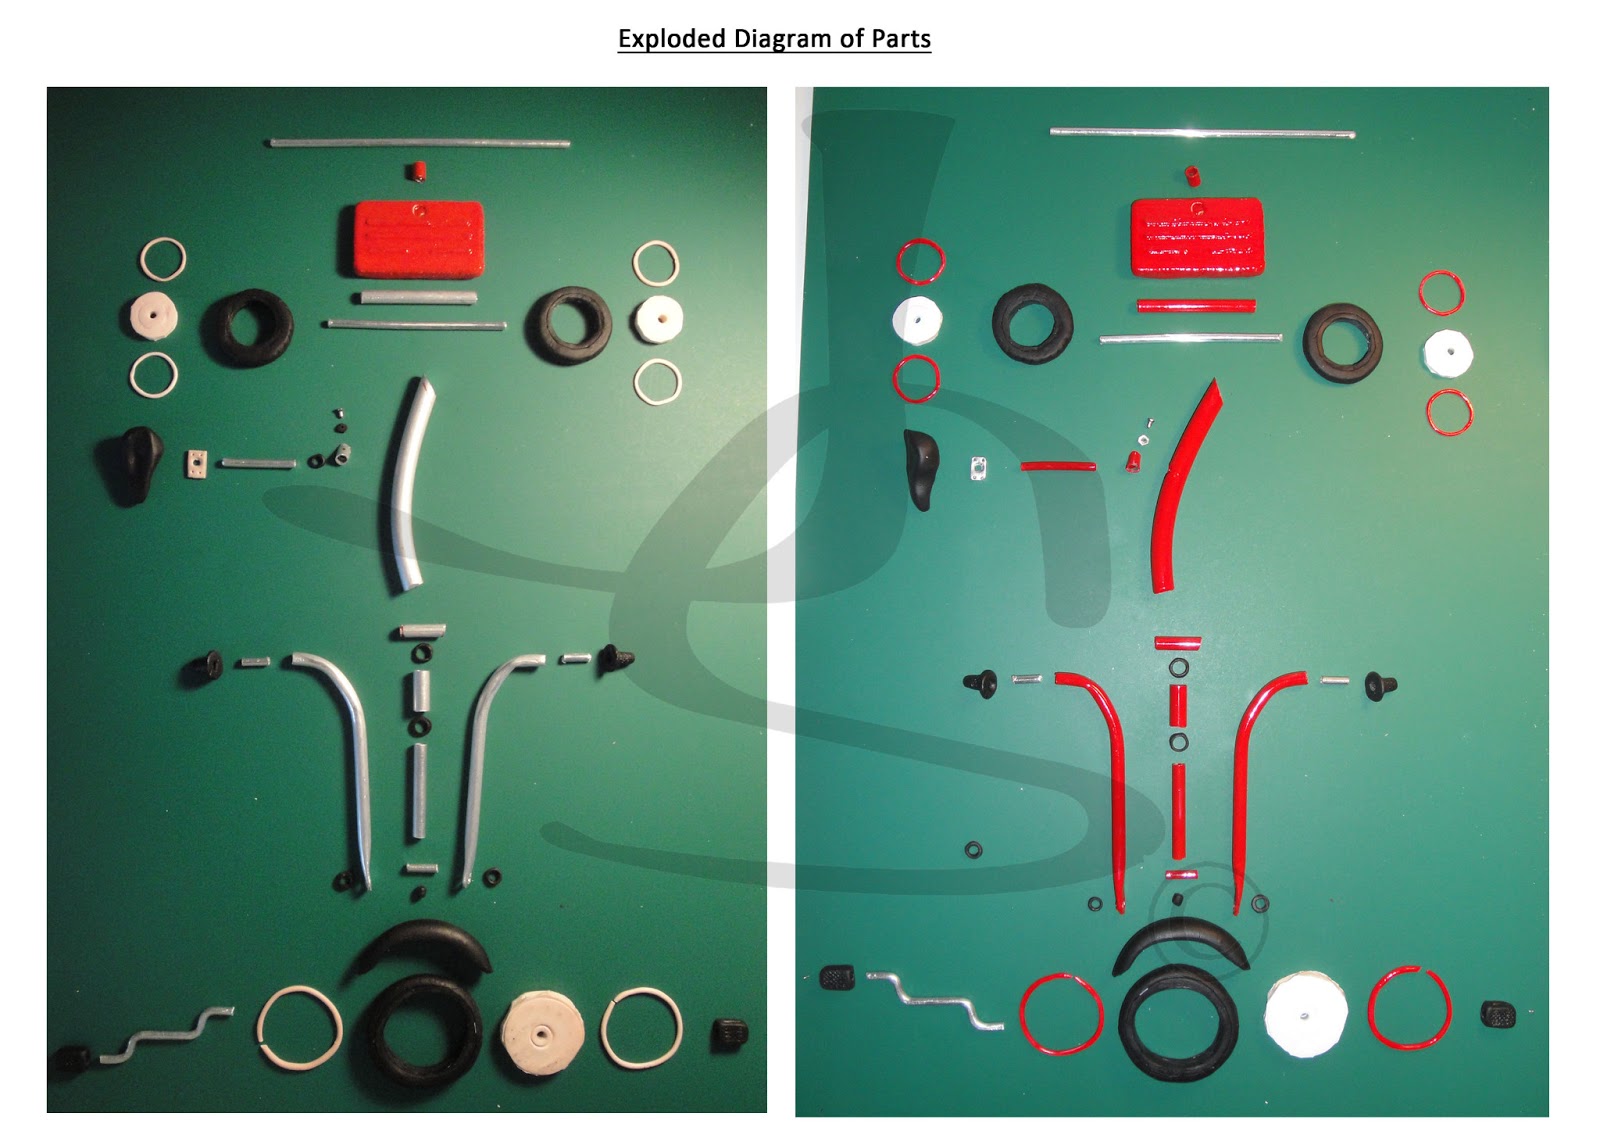
Once I had made all the parts and little components I laid them out in an exploded diagram view to make sure I had everything and to help me plan the order of which I was going to assemble everything together.
Branding - To complete the overall design I decided to add a name to the main beam making it more authentic. I printed this off on a low gloss paper, cut the lettering out using a sharp scalpel (which was insanely fiddly) and applied it to the beam.

Finishing Touches - To finish it all off and help make all the joins stronger I added more milliput to create a welded appearance, which in my opinion definitely makes it look more like an actual bike instead of a model of one. I also dirtied the bike up with paint and garden mud to help portray the characteristics of the little boy who owns this tricycle - a little trouble maker who likes going off on adventures.
No comments:
Post a Comment